Cache Pro
v1.0.0
1.4.x, 1.5.x, 1.6.x, 1.7.x, 1.8.x, 1.9.x
1.9.x - 1.14.x
Cache Pro is a custom Magento extension by NEKLO that helps you maintain your Magento-based web store cache flushing. This module allows you to cache and clean every page block separately upon request.
This extension provides trouble-free Magento cache management and improves the overall customer experience. Cache Pro custom Magento module allows you to speed up your website without any technical assistance.
With our page cache Magento extension, you will waste no more time on adjusting your web store’s cache.
- Improve loading speed
- Add or remove blocks for caching
- Set conditions for caching the elements on the page
- Serve your customers with a fast shopping experience
Clear interface and minimal configuration
Once the extension is enabled, you can start working with
existing cache blocks on the storefront.
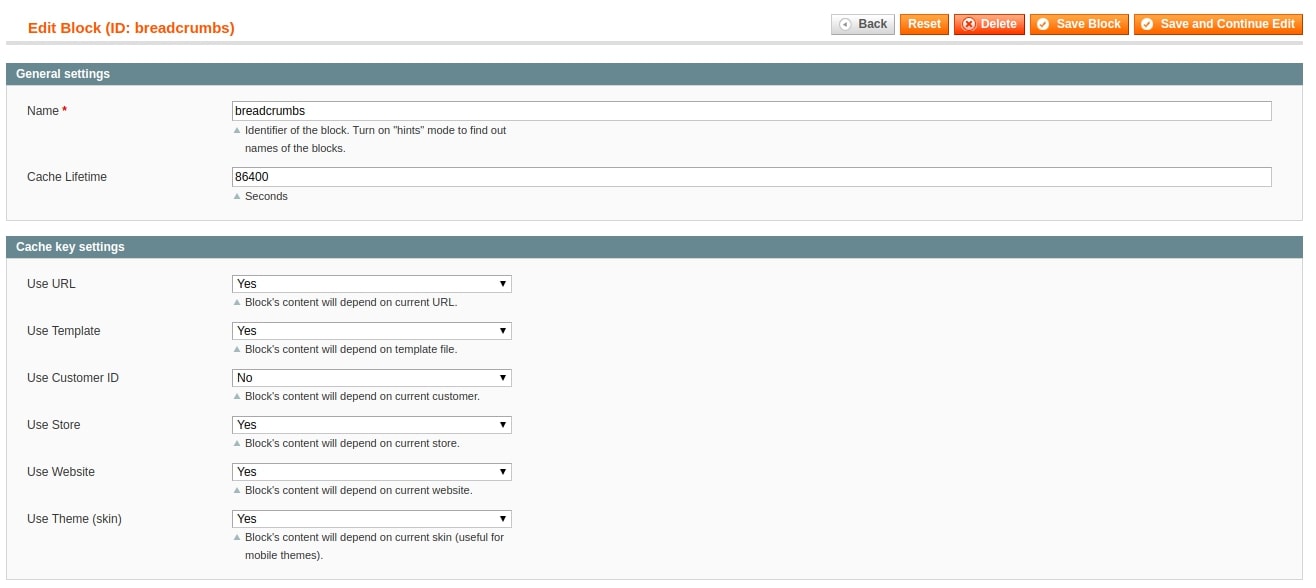
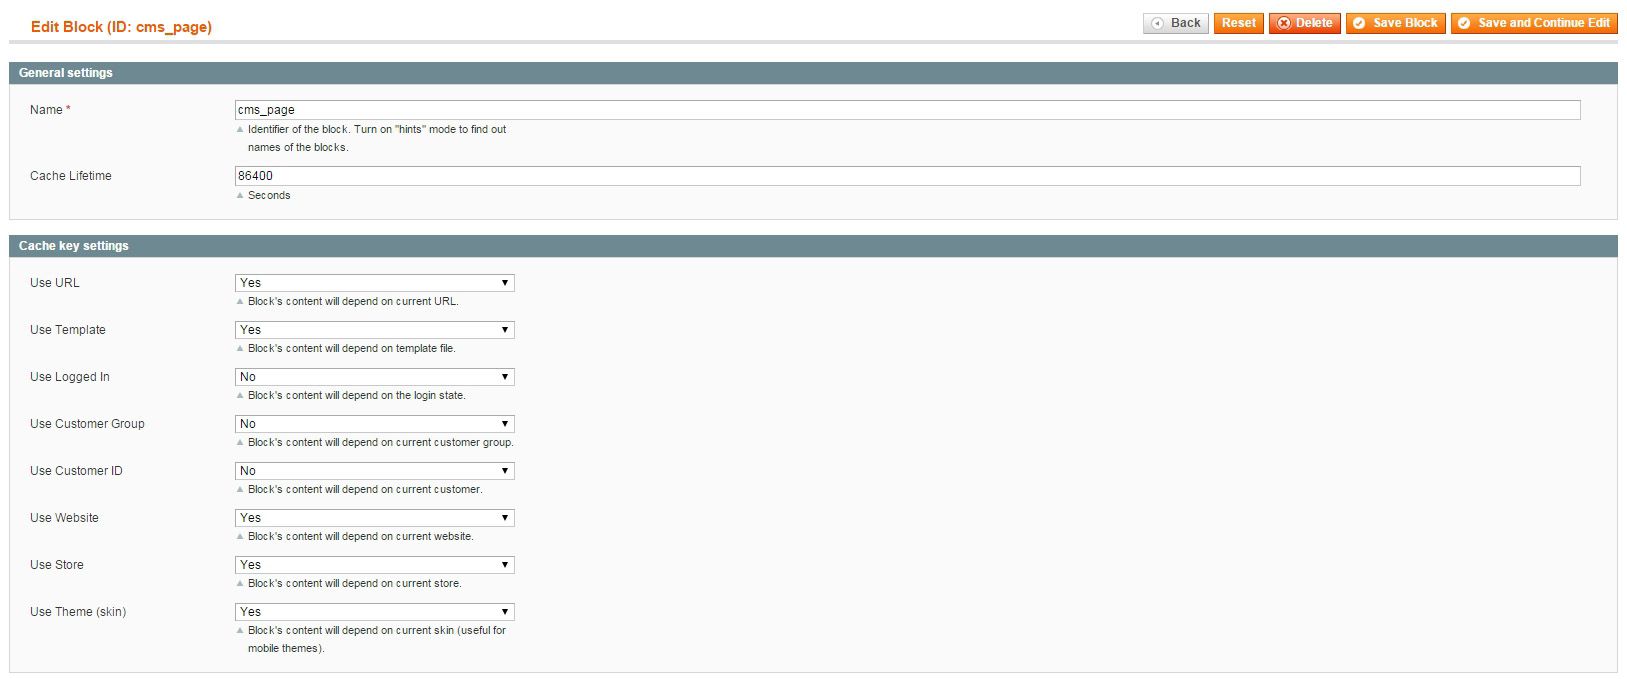
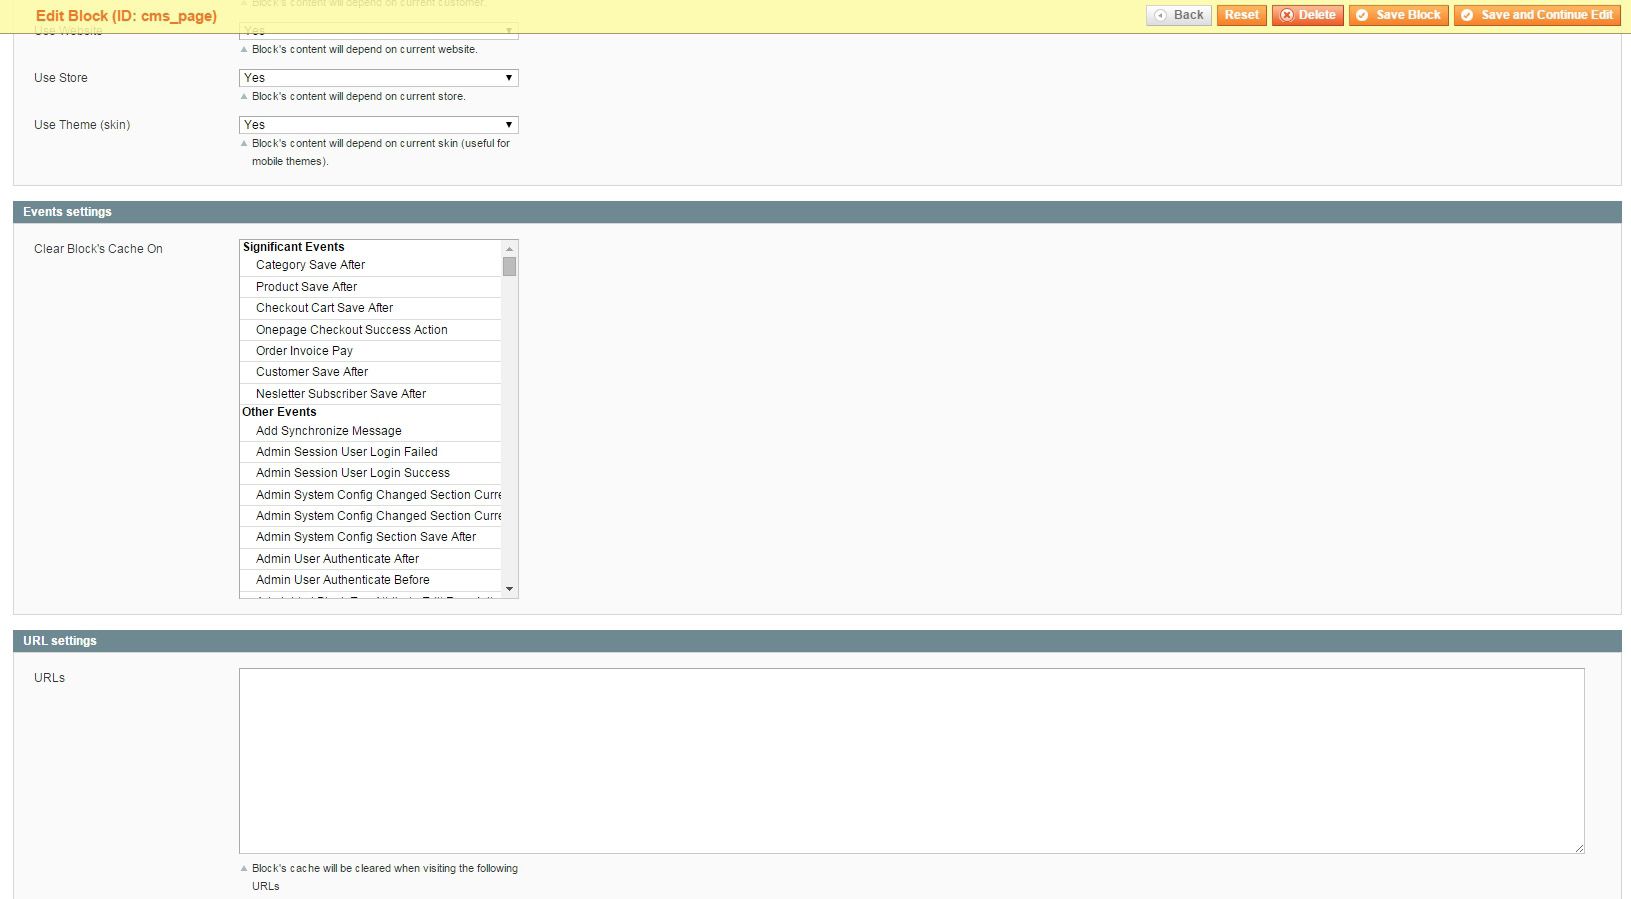
Configuration for each caching block
You can choose the name, cache lifetime, key settings and
events which trigger cache cleaning for each block.
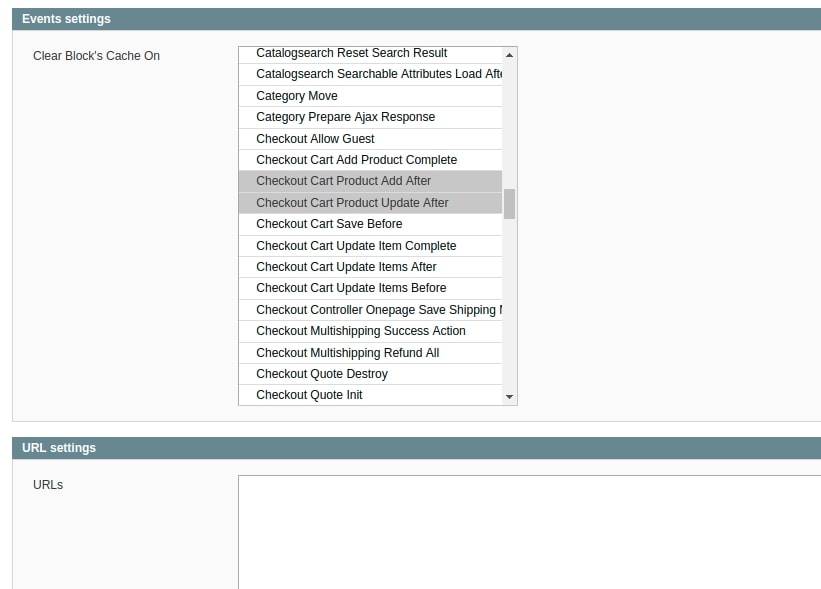
Multiple events list
You can set the actions after which this very block will
be cleaned.

Presets mode available
The blocks that are already in the Cache Pro Grid have
pre-installed settings that are compatible with your store.
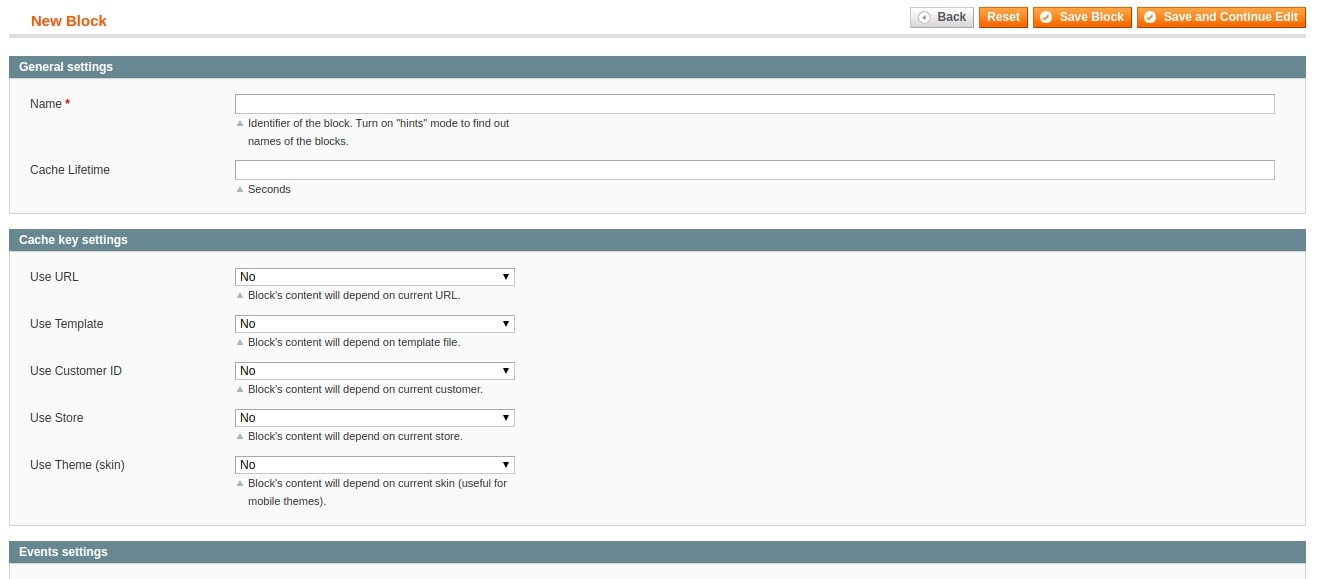
Custom configuration for every newly added block
By adding a new block to the
grid, you are able to configure it accordingly to the other blocks and your conditions.
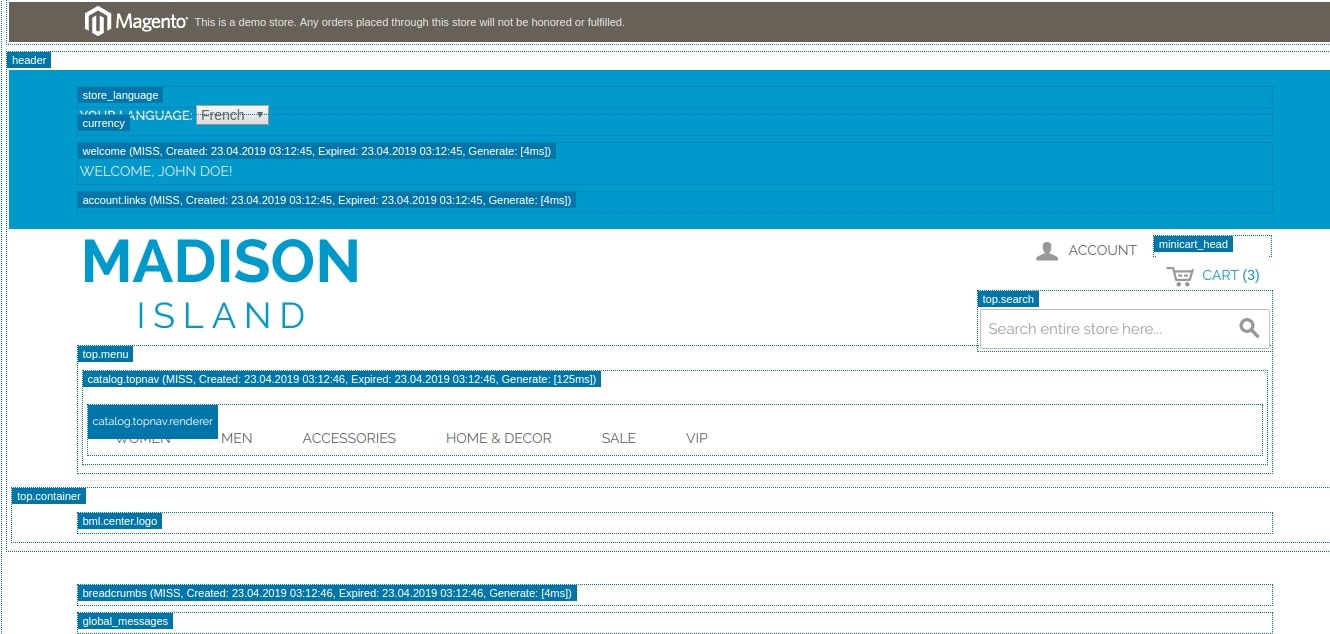
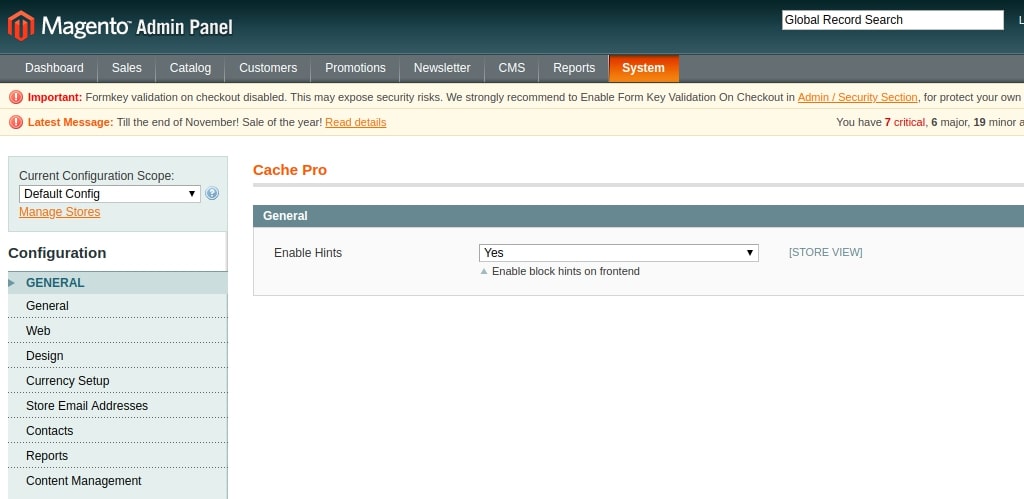
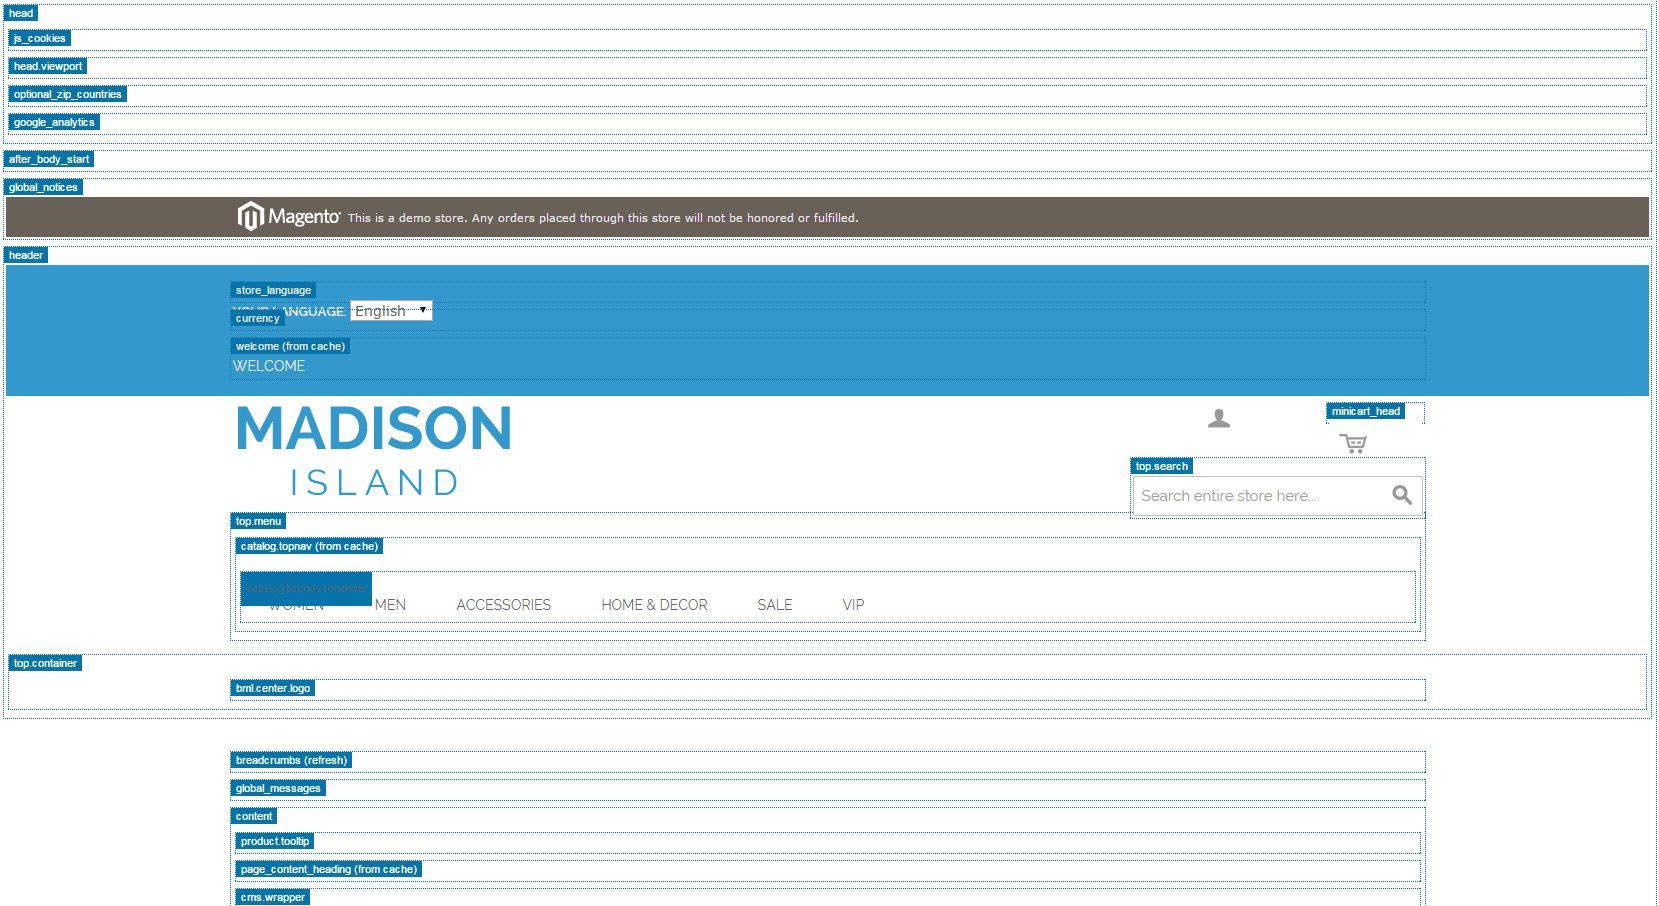
A vivid display of the hints of cache blocks
After you enable hints, you can see them
highlighted
on any storefront page for a better understanding of your caching processes and needs.
Improve your store loading time
Configure the caching options for each block
Choose the events to trigger cache cleaning
Cache blocks with preset default settings
Add and dismiss blocks to cache manually
See the hints for every caching block on the storefront


Overall Rating
4.8666666666667 of 5 stars
Online M.
5
Posted on
10 points for the ease of use. Easily installed and with some tweaking and searching for uncached blocks we managed to make some significant speed differences.
Recommendable!
Recommendable!
Totys
5
Posted on
I bet this is one of the most effective tools for site performance we've ever installed. Now the store (40000 users a month) works again just as fast as a webshop should be.
Realmagento
5
Posted on
Nice extension tgat really helps to fasten the speed of your site. You can customize every element you want to cache or not on the store's page.
Awesome support team
5
Posted on
Very fast. Glad I tried it. And the guys from the support team are great. Helped me overnight.
Moriss M.
5
Posted on
Not a cheap solution) Anyway, worth the money spent. Used it for my client’s store and he liked what he got.
Keith Mitchell
5
Posted on
We installed the extension and were not disappointed. It works and works well. Thanks the support team for their help.
Craig PJ
4
Posted on
Had some troubles with installation. Contacted support and the guys fixed everything. Overall, like it.
Mike_1985
5
Posted on
We will install it for all our clients.
Artsiom H
5
Posted on
There’s a huge performance boost! helped us greatly to enhance the user experience on our store!
Mike P.
4
Posted on
Works well in general, though I expected more from it.
Andrew C
5
Posted on
Why is this module not installed on Magento by default? The pages loading speed increased up to several seconds! Completely amazed by Сache Pro, despite being quite skeptical about it at the beginning.
Roy Morris
5
Posted on
Possibly the best solution for caching in Magento I came across lately. Oh, and do not forget the presets mode – very helpful.
Antonio Fowler
5
Posted on
With Neklo Cache Pro caching pages is simple. Only takes you a few clicks. Nice job, guys!
Marshall Fisher
5
Posted on
Well, it seems surprising to me now that this module hasn’t appeared earlier. In fact, it enables caching possibilities that Magento already has but uses rarely. Nice extension to have on a store.
Sammy Thornton
5
Posted on
Use it for my checkouts now. Really a useful one.
Write Your Own Review
Extension Features
Improved loading speed
Magento cache extension by NEKLO helps to improve the
page load speed of your web store. It copes with one of the most common Magento issues, which is
speed, with no additional technical assistance, and providing better customer experiences.
Flexibility of settings
Flexibility is the key perk of this Magento cache
extension. It easily adjusts to working within your web store’s template. As a note: Cache Pro
Magento plugin works with the pages that are not cached by a full-page cache like the checkout
page.
Automatic refreshing of invalidated caches
With the help of our Cache Pro extension, you can
specify a set of caches that will be automatically refreshed in case they are found to be
invalidated. Our extension integrates with the standard Magento scheduled tasks functionality
and follows the configuration already set up for the default group of scheduled tasks.
Ability to improve user experience
With the cache Magento plugin by NEKLO, you can specify
the exact blocks to be saved in the cache. Using this Magento module, you will be able to: Opt
for better ranking positions; Make pages 1-3 seconds faster; Provide a worthwhile customer
experience.
Frequently Asked Questions
How to install a Magento extension by NEKLO?
1. Disable Compilation mode if it is enabled (System - Tools - Compilation).
2. Unpack the archive purchased from our Magento Store and copy the contents of the ‘extension’ folder to the root folder of your Magento installation.
3. Log out from Magento Admin panel if you are logged in and then log back.
4. Clear the cache. If Cache Control is enabled in Magento go to ‘System > Cache Management’ section, select ‘Refresh’ under ‘All Cache’ drop-down menu and press ‘Save Cache Settings’.
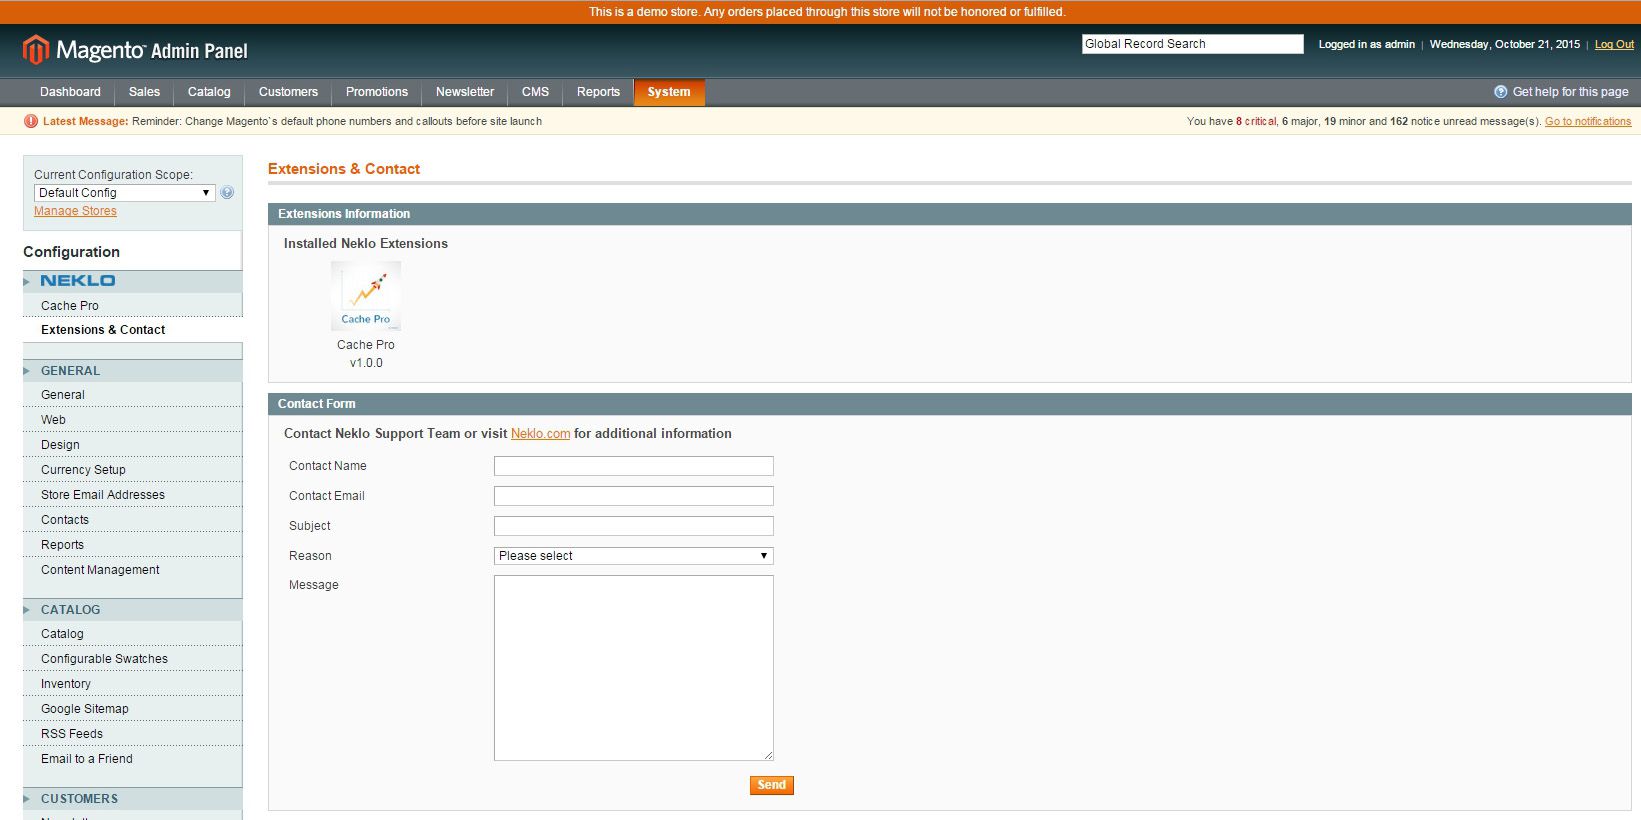
5. Go to ‘System > Configuration > NEKLO tab > Extensions & Contact’ section and check the list of extensions installed for the name of your purchased extension. If it is in the list the installation is complete.
2. Unpack the archive purchased from our Magento Store and copy the contents of the ‘extension’ folder to the root folder of your Magento installation.
3. Log out from Magento Admin panel if you are logged in and then log back.
4. Clear the cache. If Cache Control is enabled in Magento go to ‘System > Cache Management’ section, select ‘Refresh’ under ‘All Cache’ drop-down menu and press ‘Save Cache Settings’.
5. Go to ‘System > Configuration > NEKLO tab > Extensions & Contact’ section and check the list of extensions installed for the name of your purchased extension. If it is in the list the installation is complete.
I’m running several stores, shall I buy a separate extension for each of them or it is possible to use one extension?
You can use one extension per one live Magento installation. It
means that if you run multiple stores on same one Magento installation, you just
buy our extension once and then use it for all your stores.
In case your stores run on separate live Magento installations, you need to buy an extension for each of them.
In case your stores run on separate live Magento installations, you need to buy an extension for each of them.
I’m getting this error: SQLSTATE[23000]: Integrity constraint violation. What shall I do?
Next time, please, disable the compilation
mode prior to uploading the extension files to your server.
And now, please, follow these steps:
1. Open app/etc/local.xml
2. Replace
3. Log in to admin panel and disable the compilation.
4. Revert the changes in the local.xml
5. Clear the cache.
And now, please, follow these steps:
1. Open app/etc/local.xml
2. Replace
3. Log in to admin panel and disable the compilation.
4. Revert the changes in the local.xml
5. Clear the cache.
There’s a "404 Not Found" error when opening configuration page.
Please, log out and then log back into the backend, so Magento can refresh
permissions.
How to uninstall the extension?
To completely uninstall any of our extensions, first start from disabling it. To disable the
extension,
please follow the next steps:
1. Edit … file (where XXX stands for the extension name/code).
2. Change "true" to "false".
3. Clear the cache.
At this point the extension is completely disabled and is not visible for Magento.
Now you can safely remove the extension files, although it is not necessary.
1. Edit … file (where XXX stands for the extension name/code).
2. Change "true" to "false".
3. Clear the cache.
At this point the extension is completely disabled and is not visible for Magento.
Now you can safely remove the extension files, although it is not necessary.
How to disable your extension?
To disable any of our extensions, please, follow this algorithm:
1. Edit app/etc/modules/Neklo_XXX.xml file (where XXX stands for the extension name/code).
2. Change "true" to "false".
3. Clear the cache.
As soon as you have done it the extension is disabled completely, meaning it no longer affects any Magento functionality.
1. Edit app/etc/modules/Neklo_XXX.xml file (where XXX stands for the extension name/code).
2. Change "true" to "false".
3. Clear the cache.
As soon as you have done it the extension is disabled completely, meaning it no longer affects any Magento functionality.
How to translate an extension?
There are two options for translating your Magento extension.
1. Please open app/locale/en_US/ Neklo_XXX.csv, copy it to your locale folder, for example to app/locale/de_DE/ Neklo_XXX.csv and change the wording after the "," so the line will look like "Product review","Testbericht".
2. If there are the necessary language packs installed, you can use inline translation. To do that, please, go to admin/system/configuration/ developer, choose the storeview you want to translate and enable inline translation for it. Then go to the front end, select text and translate.
How to update NEKLO extension?
1. Log in into your account
2. Download the extension (it will be always the latest extension version)
3. Unpack the downloaded folders
4. Disable the Compilation mode in Magento
5. Upload the overwriting existent files of our extensions to Magento root folder (please note that if you customized the files of our extension, the customizations will be overwritten)
6. Refresh site cache (if it\'s enabled)
7. Re-run the Compilation mode
How to install the page cache Magento extension?
To install page cache Magento extension, you need to have FTP/SSH access details. Then the process begins:
1
2
3
4
5
6