Facebook Widget
v1.1.0

1.4.x, 1.5.x, 1.6.x, 1.7.x, 1.8.x, 1.9.x
1.9.x - 1.14.x
Magento Facebook Extension by NEKLO is a convenient tool to connect Magento to Facebook shop. This Magento 1 module helps to interact with your target audience and show your latest content from Facebook right on the web page of your online store.
Our Magento 1 extension allows for Magento Facebook integration with no extra clicks and settings.
This Magento plugin has become one of the most demanded Magento Facebook widget options in the NEKLO Magento extensions store as it brings ecommerce businesses closer to the customer.
Our Magento 1 extension allows for Magento Facebook integration with no extra clicks and settings.
This Magento plugin has become one of the most demanded Magento Facebook widget options in the NEKLO Magento extensions store as it brings ecommerce businesses closer to the customer.
- Configure minor things like CTA and header
- Configure what you want to show
- No authorization to a Facebook account needed
- May be assigned to any place of your store
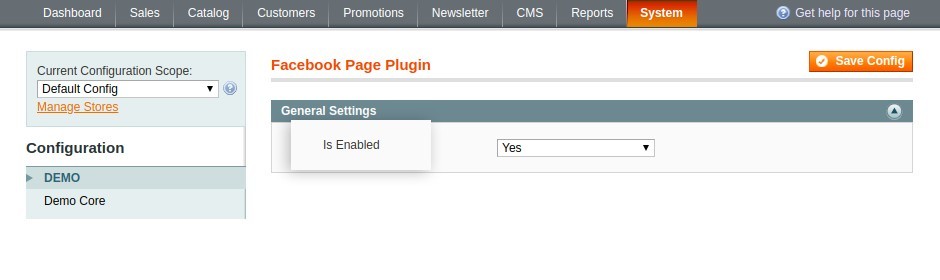
Switch Facebook Widget on and off
In the tab System > Configuration >
Neklo > Facebook Page Plugin you can enable and disable the extension.

Adding a new Facebook Widget
Add your Facebook widget. To do so, go to CMS >
Widgets > Add New Widget Instance and enter the required settings.
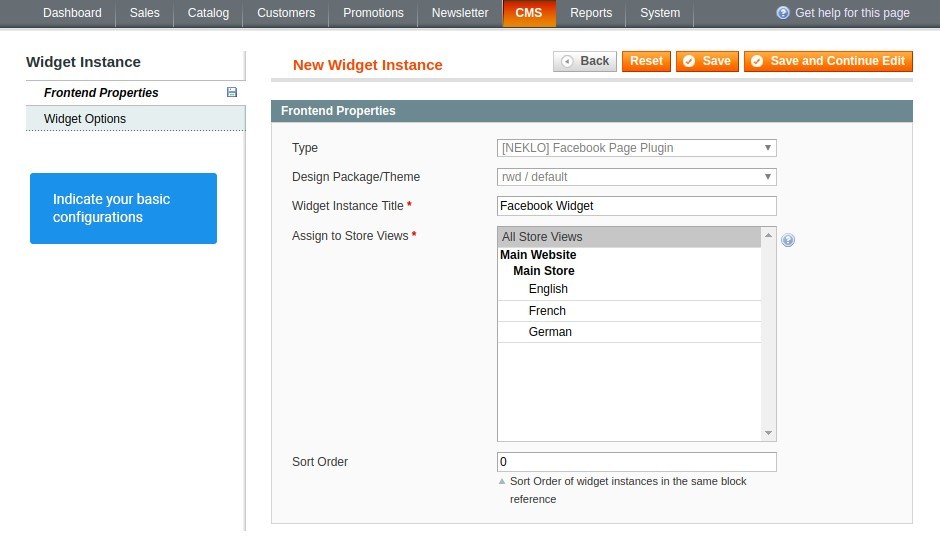
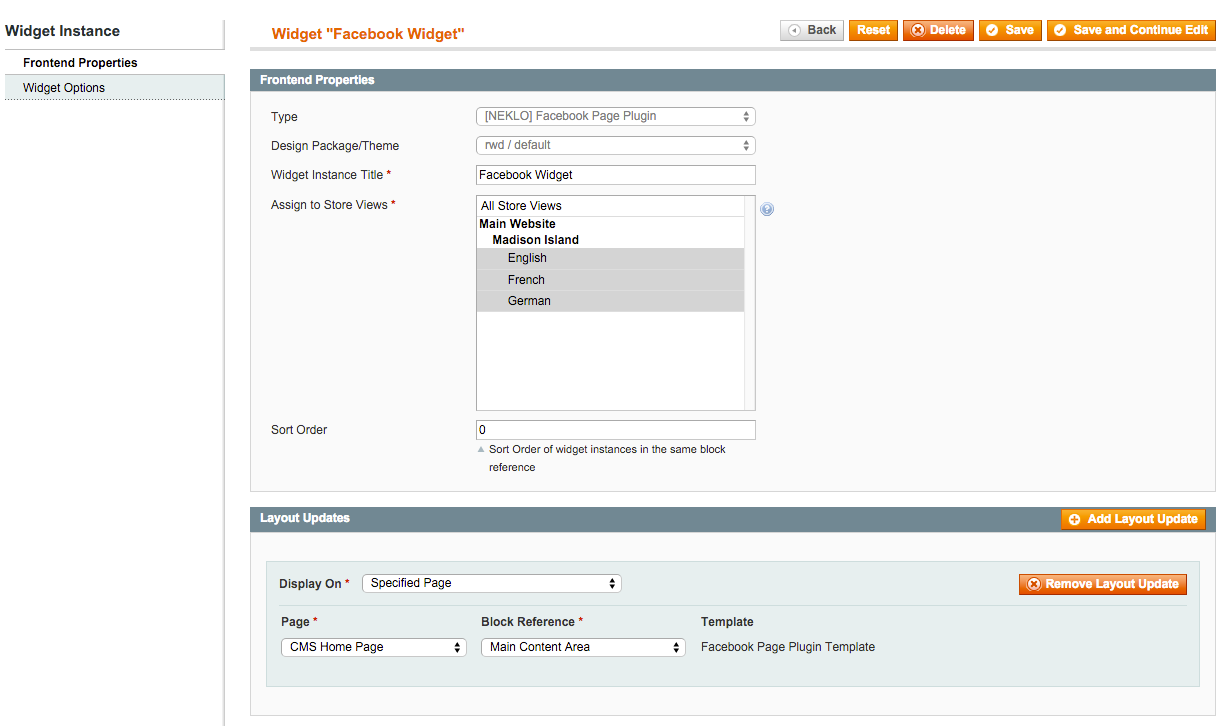
Adjusting Storefront Properties
Go to CMS > Widgets > Your Widget > Frontend
Properties and find configurations of your Facebook Widget.
Assign your widget to any place of your website
Go to CMS > Widgets > Your Widget >
Frontend Properties and find configurations of your Facebook Widget.
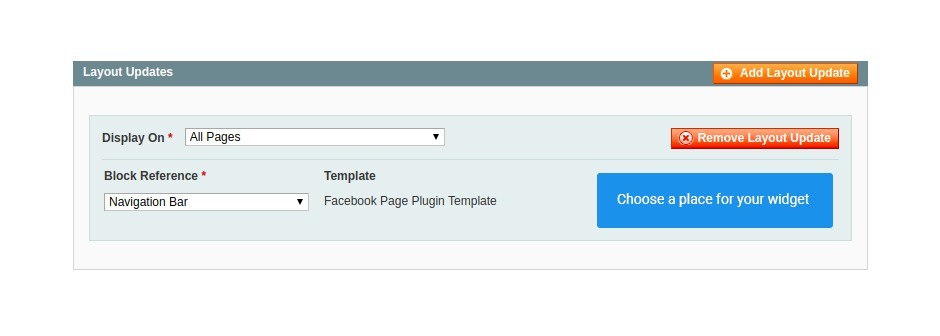
Assign your widget to any place of your website
Add Layout Update for your widget in the tab Frontend Properties.
Thus you will assign it to a particular place on your store.
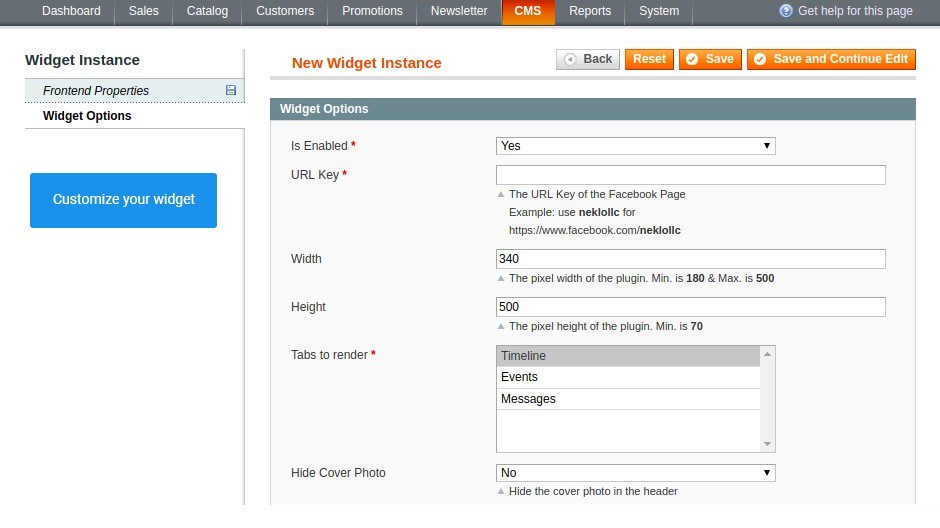
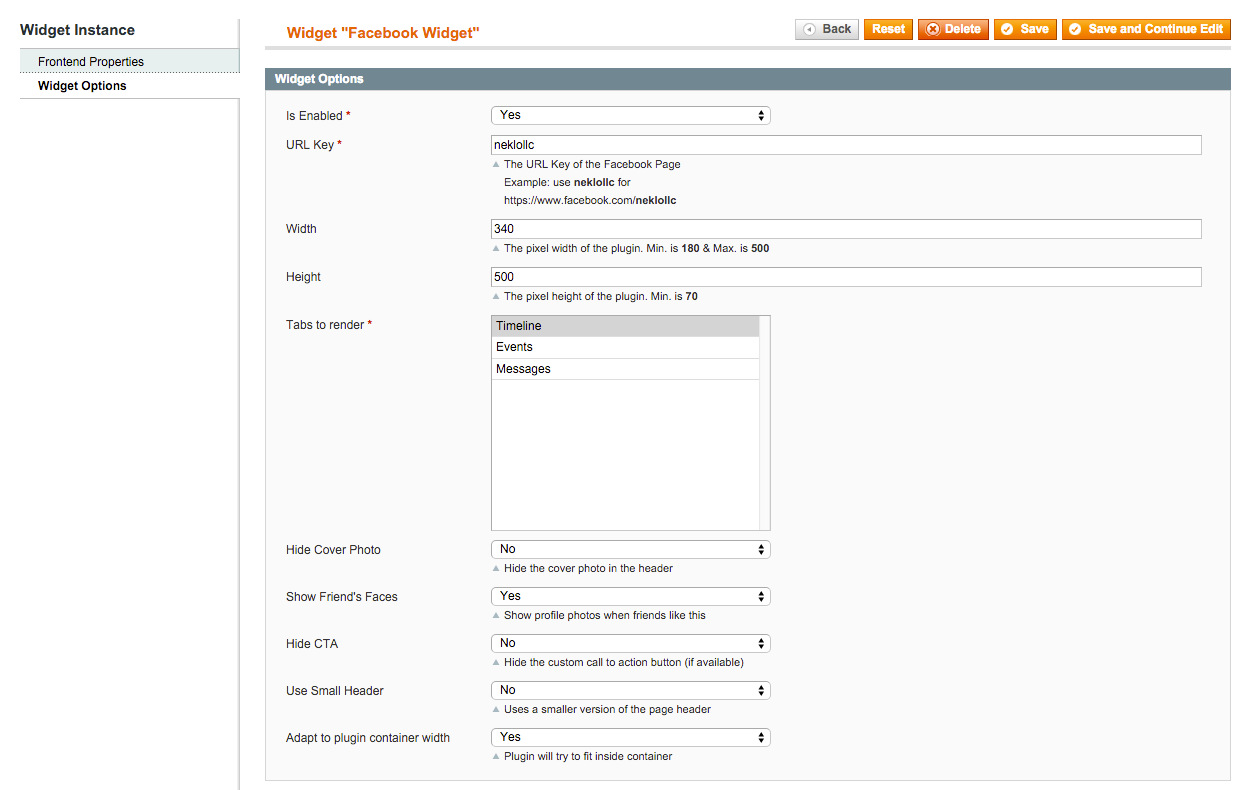
Set your own Widget Options
To adjust the widget appearance and enter the profile name, whose posts you will
display, go to CMS > Widgets > Your Widget > Widget Options.
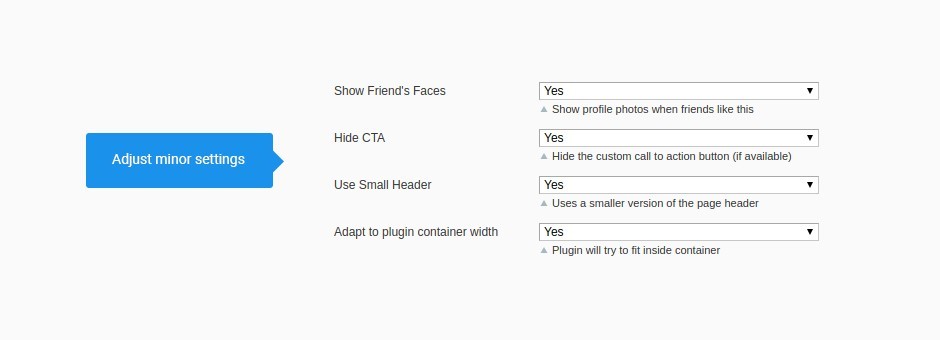
Adjust customization features
In the tab Widget Option you can also set other minor options for widget customization.
Note that you can set here only Business Account on Facebook. It is not possible to operate with personal accounts.
Note that you can set here only Business Account on Facebook. It is not possible to operate with personal accounts.
Work start
Widget Table
Main settings
Layout Update
Widget Appearance
Additional customization


Overall Rating
5 of 5 stars
cosmoten10
Posted on
Simple and what is more important free plugin to display your Facebook timeline on Magento website.
oygen28
5
Posted on
Thank you guys! Why should I pay for the combiners of social media when I can download only that extensions that are needed (in my case Facebook). Great!
Write Your Own Review
Extension Features
Quick installation & configuration
The Installation of this Facebook Widget for Magento 1
is effortless. Extract the files to your Magento installation folder and flush the cache. The
configurations of this Magento 1 extension allow you to select the Facebook accounts that you
want to link and the content to display. However, note that you have to use Facebook Business
Accounts.
Customer feedback driving tool
Facebook Magento 1 module by NEKLO can serve to get
feedback from the customers. Through their own Facebook accounts, people are able to comment and
send direct messages. This feature saves your time as there’s no need to create a separate
contact form.
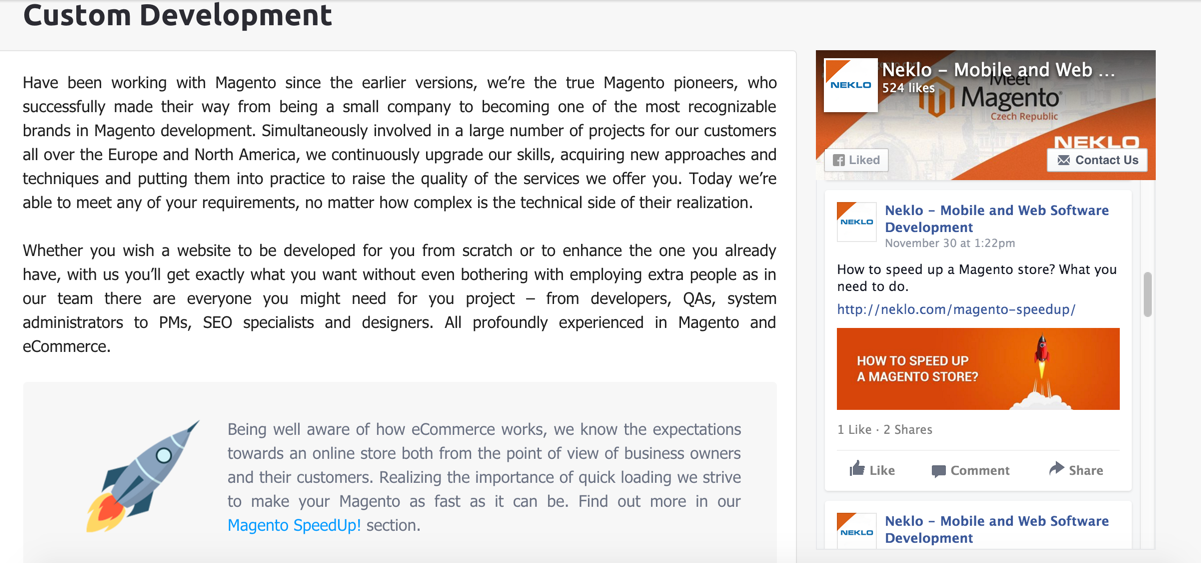
Adding professional look to your web store
Embedding the most popular social network on your
ecommerce website makes it more interactive and professional. Your customers will get one more
option to follow the store's updates. Moreover, our Facebook Widget makes it easier to contact
your web store and spread the word about your brand on Facebook.
Lots of customization options
Facebook Widget for Magento 1 provides you with 3
content display modes: Timeline, Events, and Messages. They can be applied separately or all at
once.
Frequently Asked Questions
How to install a Magento extension by NEKLO?
1. Disable Compilation mode if it is enabled (System - Tools - Compilation).
2. Unpack the archive purchased from our Magento Store and copy the contents of the ‘extension’ folder to the root folder of your Magento installation.
3. Log out from Magento Admin panel if you are logged in and then log back.
4. Clear the cache. If Cache Control is enabled in Magento go to ‘System > Cache Management’ section, select ‘Refresh’ under ‘All Cache’ drop-down menu and press ‘Save Cache Settings’.
5. Go to ‘System > Configuration > NEKLO tab > Extensions & Contact’ section and check the list of extensions installed for the name of your purchased extension. If it is in the list the installation is complete.
I’m running several stores, shall I buy a separate extension for each of them or it is possible to use one extension?
You can use one extension per one live Magento installation. It
means that if you run multiple stores on same one Magento installation, you just
buy our extension once and then use it for all your stores.
In case your stores run on separate live Magento installations, you need to buy an extension for each of them.
In case your stores run on separate live Magento installations, you need to buy an extension for each of them.
I’m getting this error: SQLSTATE[23000]: Integrity constraint violation. What shall I do?
Next time, please, disable the compilation
mode prior to uploading the extension files to your server.
And now, please, follow these steps:
1. Open app/etc/local.xml
2. Replace
3. Log in to admin panel and disable the compilation.
4. Revert the changes in the local.xml
5. Clear the cache.
And now, please, follow these steps:
1. Open app/etc/local.xml
2. Replace
3. Log in to admin panel and disable the compilation.
4. Revert the changes in the local.xml
5. Clear the cache.
There’s a "404 Not Found" error when opening configuration page.
Please, log out and then log back into the backend, so Magento can refresh
permissions.
How to uninstall the extension?
To completely uninstall any of our extensions, first start from disabling it. To disable the
extension,
please follow the next steps:
1. Edit … file (where XXX stands for the extension name/code).
2. Change "true" to "false".
3. Clear the cache.
At this point the extension is completely disabled and is not visible for Magento.
Now you can safely remove the extension files, although it is not necessary.
1. Edit … file (where XXX stands for the extension name/code).
2. Change "true" to "false".
3. Clear the cache.
At this point the extension is completely disabled and is not visible for Magento.
Now you can safely remove the extension files, although it is not necessary.
How to disable your extension?
To disable any of our extensions, please, follow this algorithm:
1. Edit app/etc/modules/Neklo_XXX.xml file (where XXX stands for the extension name/code).
2. Change "true" to "false".
3. Clear the cache.
As soon as you have done it the extension is disabled completely, meaning it no longer affects any Magento functionality.
1. Edit app/etc/modules/Neklo_XXX.xml file (where XXX stands for the extension name/code).
2. Change "true" to "false".
3. Clear the cache.
As soon as you have done it the extension is disabled completely, meaning it no longer affects any Magento functionality.
How to translate an extension?
There are two options for translating your Magento extension.
1. Please open app/locale/en_US/ Neklo_XXX.csv, copy it to your locale folder, for example to app/locale/de_DE/ Neklo_XXX.csv and change the wording after the "," so the line will look like "Product review","Testbericht".
2. If there are the necessary language packs installed, you can use inline translation. To do that, please, go to admin/system/configuration/ developer, choose the storeview you want to translate and enable inline translation for it. Then go to the front end, select text and translate.
How to update NEKLO extension?
1. Log in into your account
2. Download the extension (it will be always the latest extension version)
3. Unpack the downloaded folders
4. Disable the Compilation mode in Magento
5. Upload the overwriting existent files of our extensions to Magento root folder (please note that if you customized the files of our extension, the customizations will be overwritten)
6. Refresh site cache (if it\'s enabled)
7. Re-run the Compilation mode
Magento Facebook extension Installation Guide
To install Magento Facebook extension, you need to have FTP/SSH access details. Then the process begins:
1
2
3
4
5
6